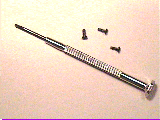
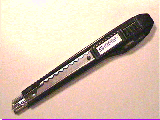
What you'll need:
Clean and light area to work
Take care with static! Touch the battery contacts first to equalize potentials!


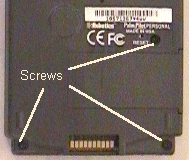
For Pilot 1000/5000: There are 3 screws, two are very easy to see. The 3rd one is underneath the back label, very close to reset hole. To not void your warranty, unpeel the label using x-acto knife or equivalent. Remove the screw and put the sticker back on. Keep this 3rd screw in a safe place just in case. I've been using my Pilot with two screws only with no problems. See an important note from Mr.Kurt about replacing the screws on the end of this page.
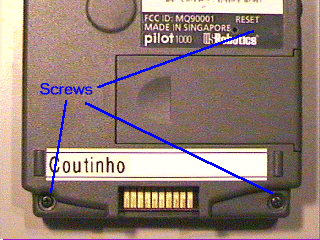
For PalmPilots: The new back label has a hole for the 3rd screw now (picture courtesy of Carlos A.A.Hespanhol). USR also included labels for the RESET hole, CE and FCC approvals.
Once you have your Pilot open, take care of piezoelectric transducer and its wires. I detached it from back cover and stuck it on top of U1 (Main CPU MC68328). This way you can open your Pilot whenever you want without worrying about wires. Note: The audio volume would decrease when moving the buzzer from original location to U1 top. See an important note from Mr.Kurt about increasing the volume on the end of this page.
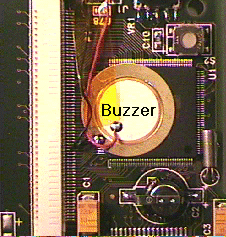
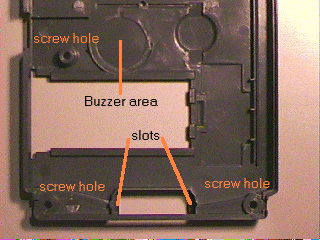
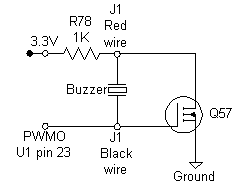
The red wire is connected to the 3.3V line thru a 1K ohm resistor (R78) and to inner circle. To increase voltage swing to 6.6V over the buzzer, there is a transistor (Q57) hooked up between this node and ground . The black wire is connected to the outer circle and to PWMO (Pulse Width Modulator Output) pin of the main CPU (U1, pin 23). It is also connected to the gate of Q57. When PWMO is high (3.3V) it saturates Q57 and cause the red wire go to 0 volt. When PWMO is low (0V) it causes Q57 to open and the red wire goes to 3.3V thru R78. The total voltage swing over the buzzer is 6.6V peak-to-peak (Cool!). You can drive an external audio amplifier using my audio adapter .
Important Notes from Mr. Kurt Carter @ JPL
"Buzzer comments:
I modified my PalmPilot by removing the buzzer, drilling a .082 hole in the center of the
buzzer area of the back case, and reinstalling the buzzer in its place, pressing firmly around
the edges (with my stylus, of course) and then reassembling. I'd estimate the sound is 3 or 4
times louder...on par with my Timex datalink wristwatch! The sound is quite directional
though, and I found it sounds best when sitting flat on a hard surface such as a desk. The
bump in the case (over the memory capacitor) keeps the hole from being obstructed, and the
desk does a great job of resonating the sound in all directions. It sounds good on the HotSync
stand as well. Note that I also have the "Volume Control" application installed, which makes
the buzzer louder by setting the volume softer...one of those piezo acoustic things I guess.
Holding your finger over the new hole results in the pre-modification sound, which makes for
easy comparison. Sorry to say, when inserted into the nice leather case, much of this benefit
seems to be diminished, but it's still louder than "stock issue".
Case screw comments:
You might want to tell people that repeatedly removing and replacing screws in any plastic
case can wear-out the threads to the point where they won't hold a screw anymore. The best way
to avoid this is through careful thread allignment when reinstalling the screws: Insert screw
in hole, and gently turn it backwards until you feel a distinct "click" then reverse direction
and the screw should go in easily. (A caution not to over-tighten might be advised too.) I
realize you can go so far in warning people that you sound like a lawyer, but I've found a
number of people these days without the experience you and I probably learned the hard way."
Thanks Mr.Kurt !
[ Next Page ] [ Back to Hardware & Stuff ]